Category: Field Manual

Your one stop shop for step by step instruction on setting up and running your blog content through the blog bunker.

  • The Field Manual 03: One Post, Every Platform

    The Field Manual 03: One Post, Every Platform

    The Social Pipeline works the same way the Article Pipeline does — one idea moves through a fixed set of stages, in order, and comes out the other side ready to go live. Five stages this time: Idea, Caption, Hashtags, Image, Publish.

    Stage 1: Idea

    Start with a concept — as short as a phrase. This can be a fresh idea, or a post you’re repurposing from something you already wrote in the Article Pipeline. Either way, pick which platform(s) you’re posting to before moving on, since everything downstream is built around that choice.
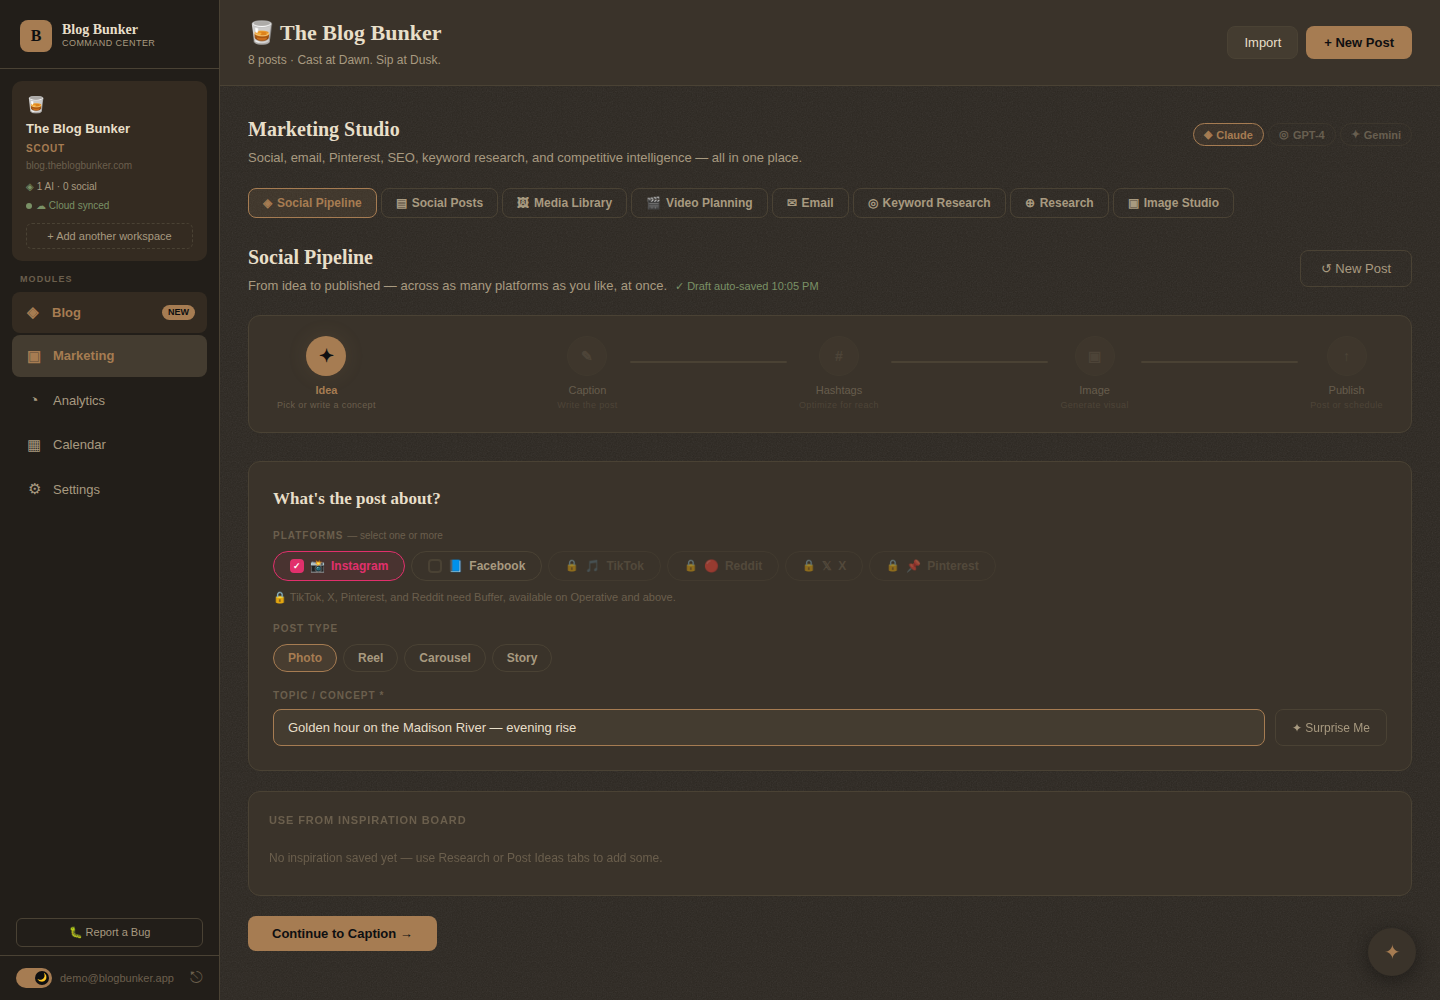
    01-idea-stage

    Stage 2: Caption

    Click Write Caption and Blog Bunker drafts the post copy for you — in your Brand Guide’s voice, sized to whatever platform you picked. Not happy with it? Edit directly in the box, or regenerate. Nothing here is final until you say so.
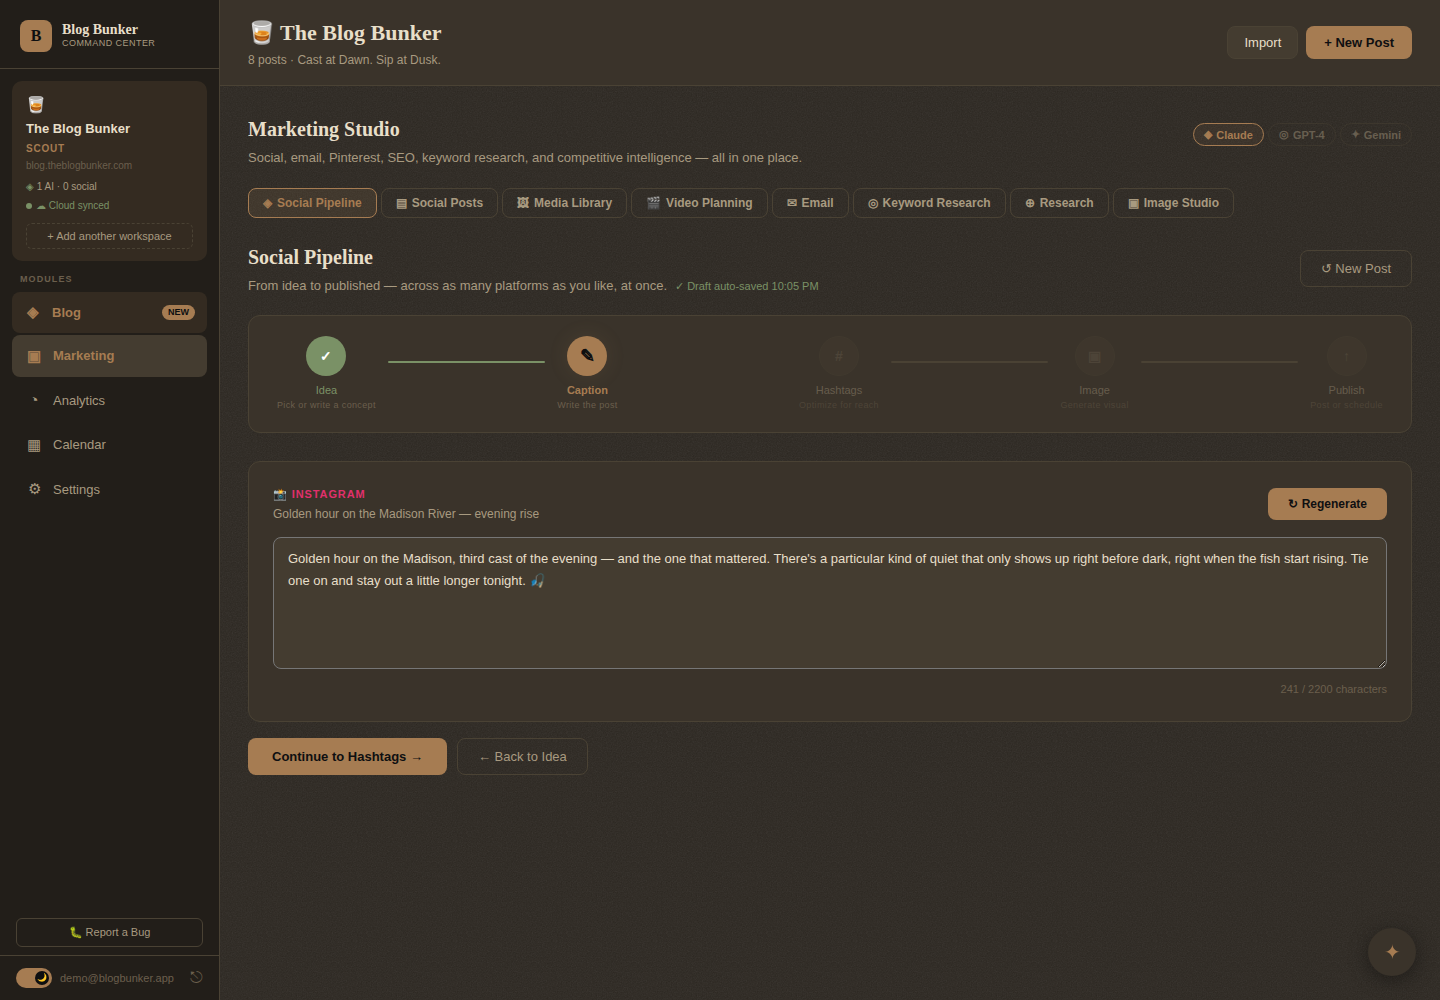
    02-caption-stage

    Stage 3: Hashtags

    This stage does more than suggest tags — it scores the post itself. You’ll see an Optimization Score breaking down things like Hook Strength, Save-Worthiness, Format Fit, and Hashtag Relevance, so you know why a post is likely to perform, not just a number with no explanation. Use it to catch what’s weak before you publish, not after.
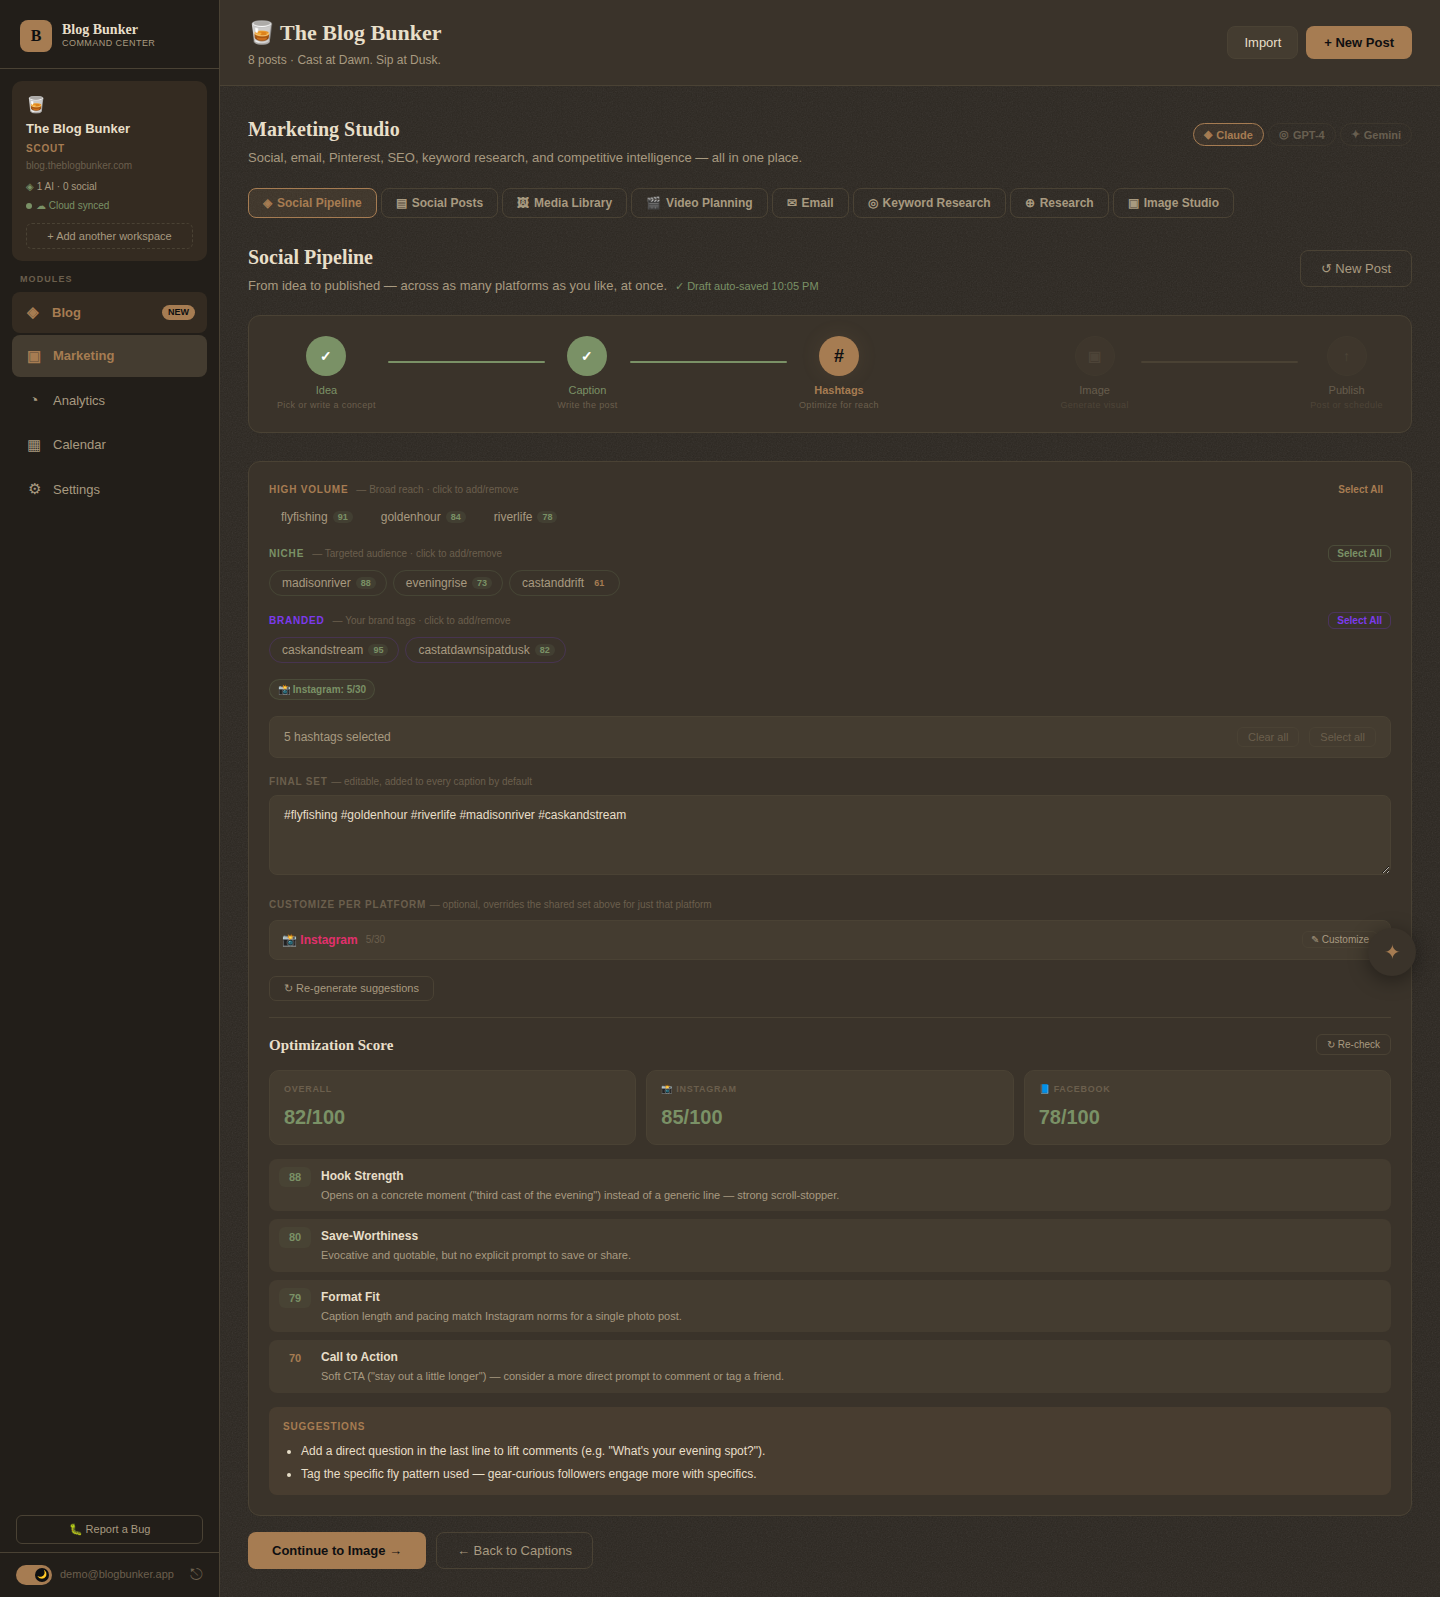
    03-hashtags-stage

    Stage 4: Image

    Generate a visual right here, or pull an existing one from your Media Library — no separate design tool required. Same as the Article Pipeline’s Enhance stage: the art gets made as part of finishing the post, not as a separate errand you do somewhere else.

    Stage 5: Publish

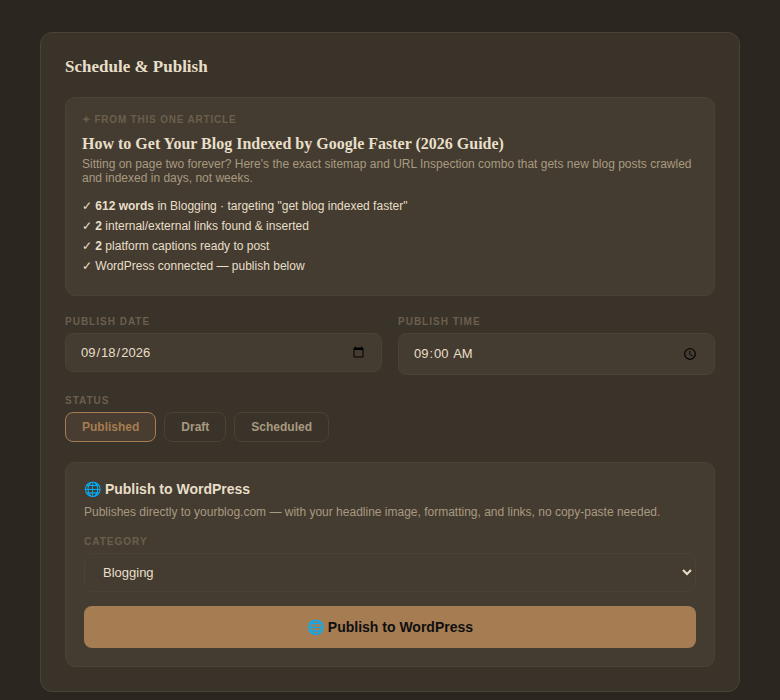
    Review everything, then either post immediately or schedule it. Publishing to multiple platforms at once from a single pipeline run is the whole point of this tool — write once, adapt automatically, ship everywhere.
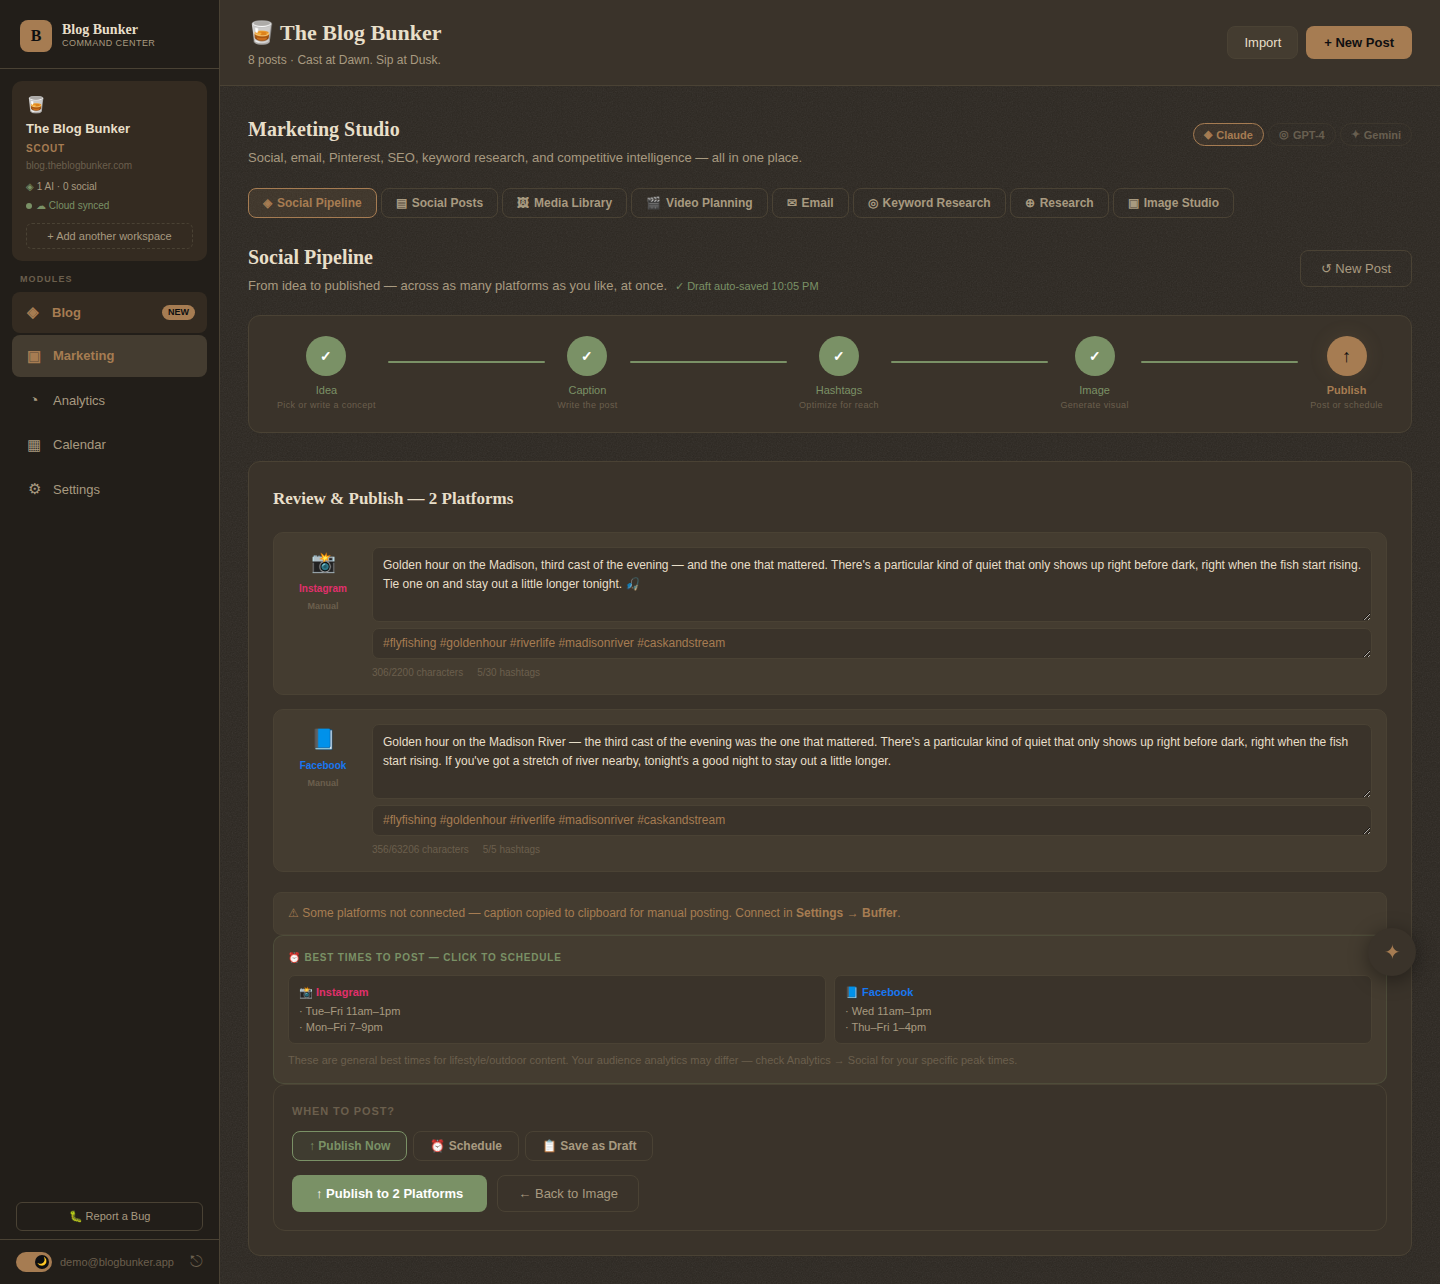
    04-publish-stage

    What’s next

    Once it’s live (or scheduled), it shows up on your Calendar right alongside your blog posts, and feeds into your performance numbers under Analytics.

  • Guide to Your First Blog Post Workflow

    Guide to Your First Blog Post Workflow

    Everything in Blog Bunker runs through one core workflow: the Article Pipeline. A post moves through five stages, in order, without you ever leaving the pipeline to hunt for a different tool. This walks through all five with your actual first post.  

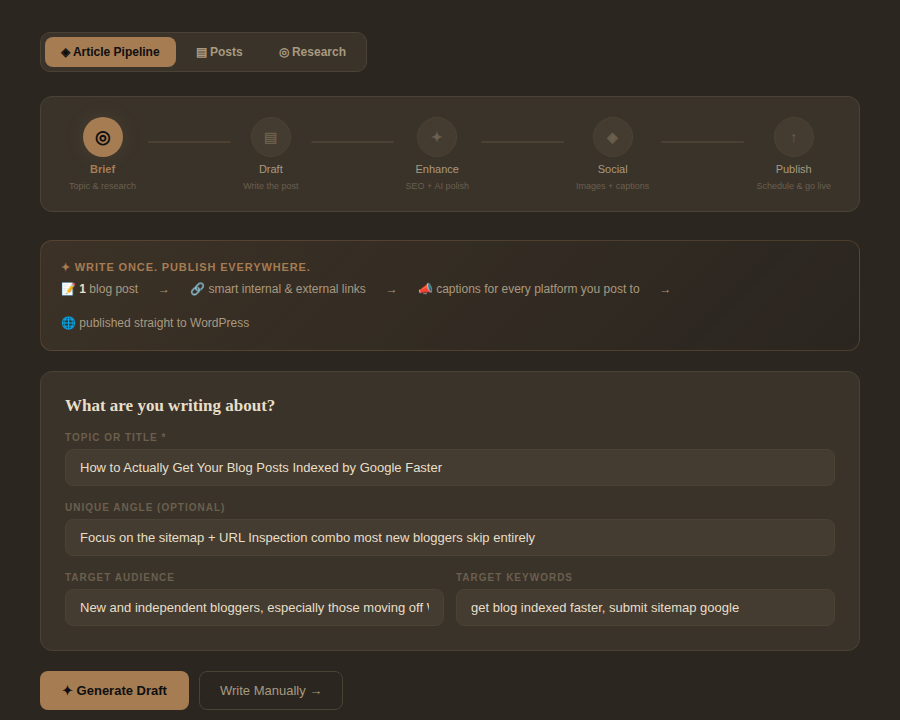
    Stage 1: Brief

    This is where a post starts — a topic, an angle, what you want it to accomplish. If you’re not sure what to write about yet, this is also where the Research tools live: Competitors (what similar blogs are covering), Inspiration, and AI Ideas grounded in your own Brand Guide, not generic suggestions. blog-bunker-brief-stage-screenshot

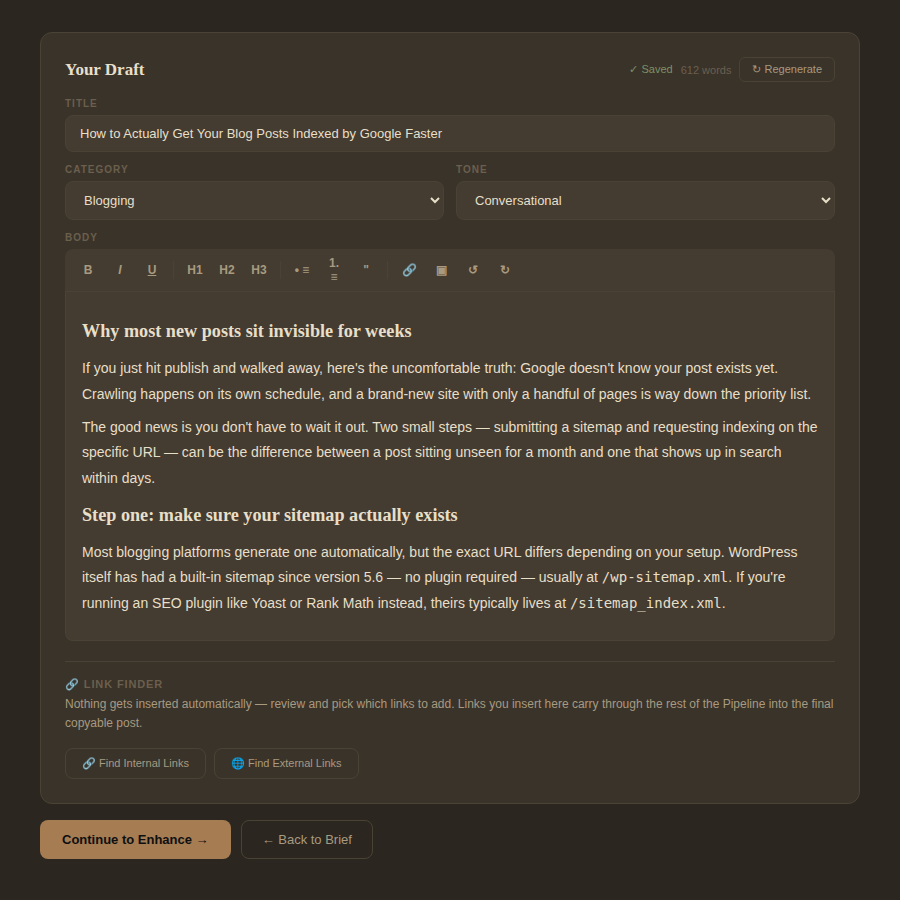
    Stage 2: Draft

    Once you’ve got a brief, this stage writes the actual post — in the voice and style you set up in your Brand Guide back in Tutorial 01. It’s a starting draft, not a finished one; expect to read it over and adjust things that don’t sound like you yet. blog-bunker-draft-stage-screenshot

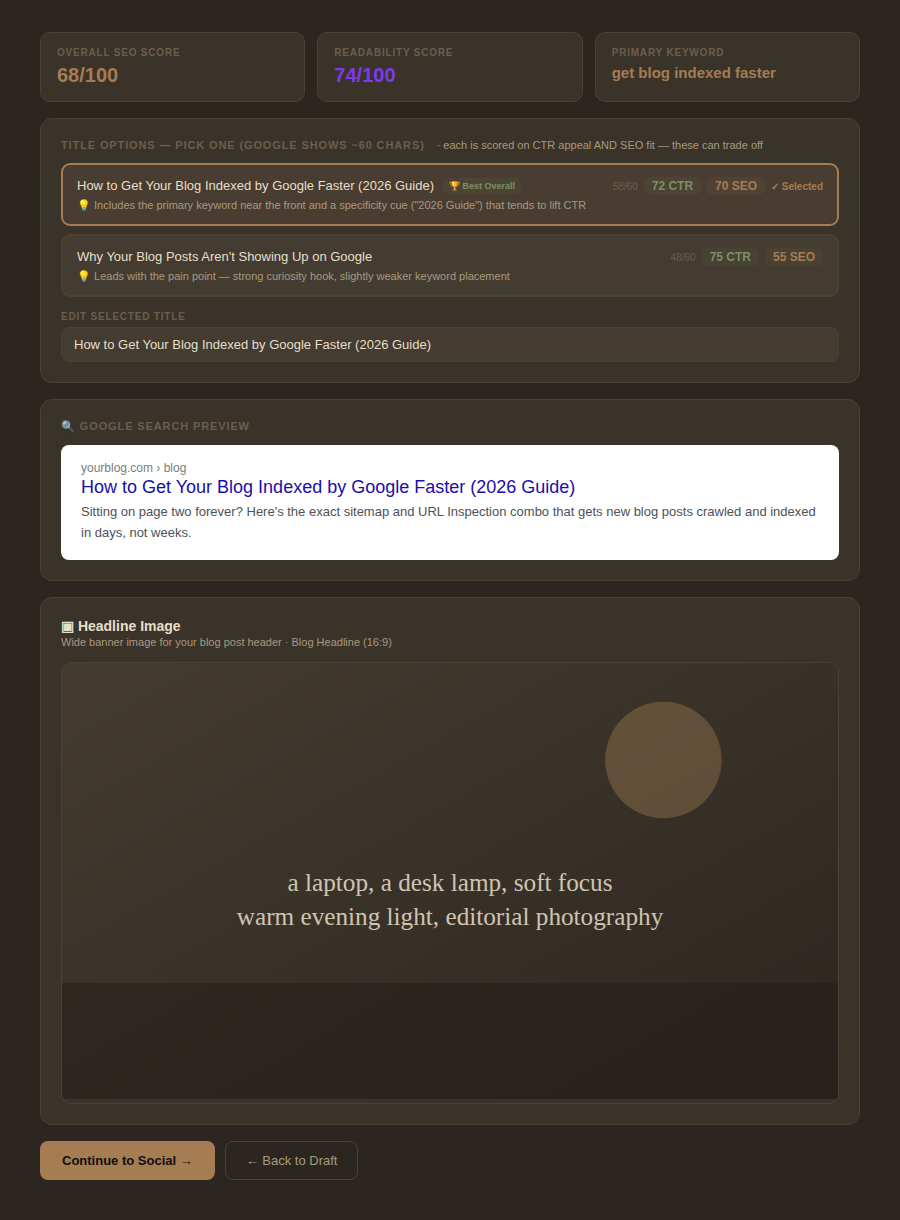
    Stage 3: Enhance

    This stage does two things at once: SEO polish (title, structure, keywords) and generates your headline image. You don’t need a separate design tool open — the art gets made right here, as part of finishing the post rather than as a separate errand afterward. blog-bunker-enhance-stage-screenshot

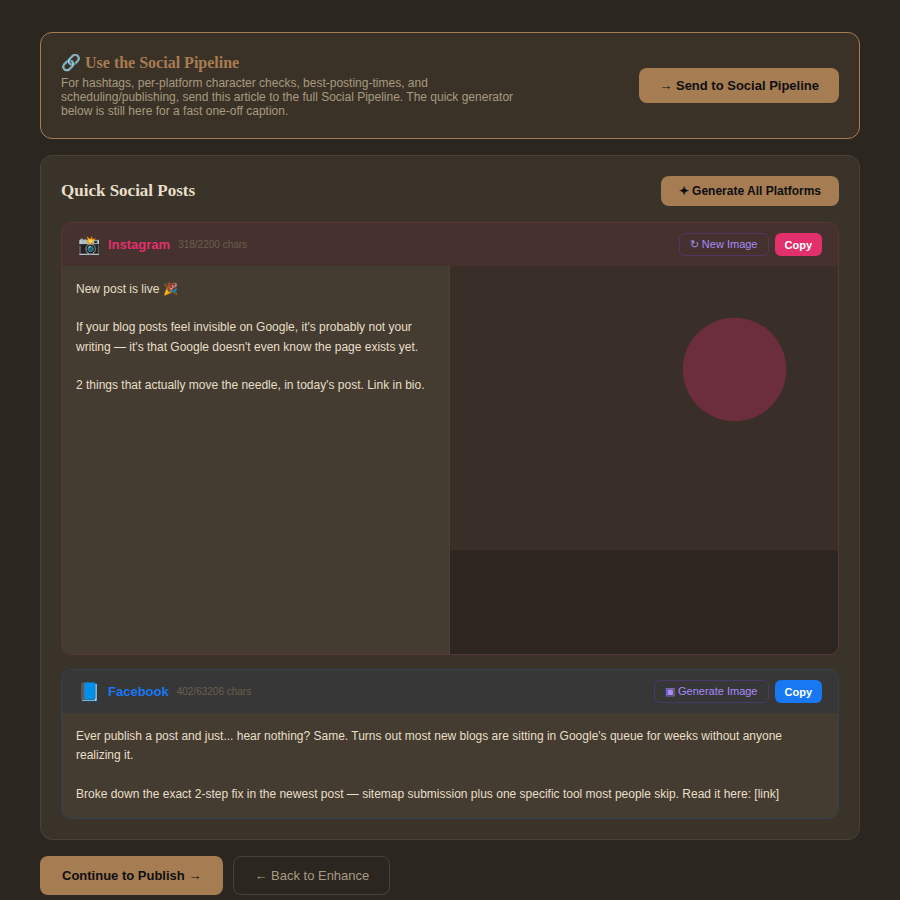
    Stage 4: Social

    This is where one post becomes several. Blog Bunker drafts channel-specific versions — a caption, a thread, whatever fits your connected platforms — sized to each one’s actual limits, built from the post you just finished rather than starting from scratch. blog-bunker-social-stage-screenshot

    Stage 5: Publish

    The last stop. Review everything, then publish. If you connected WordPress in Tutorial 01, you’ll see a 🌐 Publish to WordPress button here — click it and the post goes live on your real site. Blog Bunker also remembers which WordPress post it made, so if you edit and republish later, it updates the same post instead of creating a duplicate. blog-bunker-publish-stage-screenshot

    What’s next

    Once it’s published, two places pick up automatically: your Calendar (so you can see it alongside anything scheduled for social) and your Analytics, where your Blog Health Score starts factoring in what you just shipped. That’s the whole loop — one idea, one pipeline, five stages, out the door. The next Field Manual entries cover the Social Pipeline, the Media Library, and Research tools in more depth, for when you’re ready to go past the basics.
  • Quick Start: Your Blog Bunker Setup

    Quick Start: Your Blog Bunker Setup

    New to Blog Bunker? This is the one to start with. It’ll take about five minutes, and by the end your account is ready to write and publish your first real post.

    Step 1: Sign in

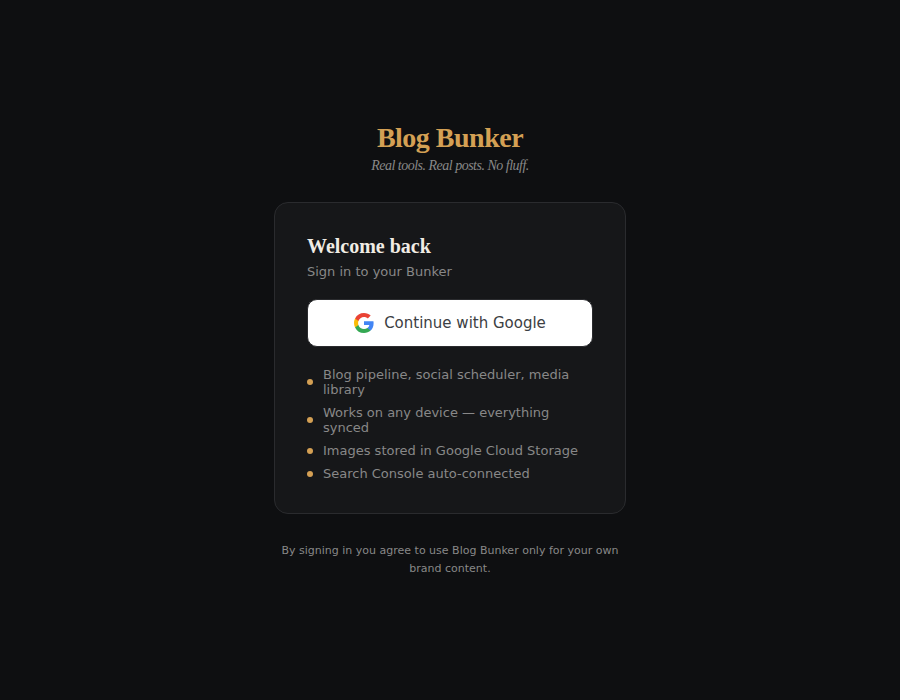
    Blog Bunker uses Google sign-in — no separate password to create or remember. Click Sign in with Google, pick the account you want tied to your blog, and you’re through the door. blog-bunker-signin-screenshot

    Step 2: Tell Blog Bunker about your blog

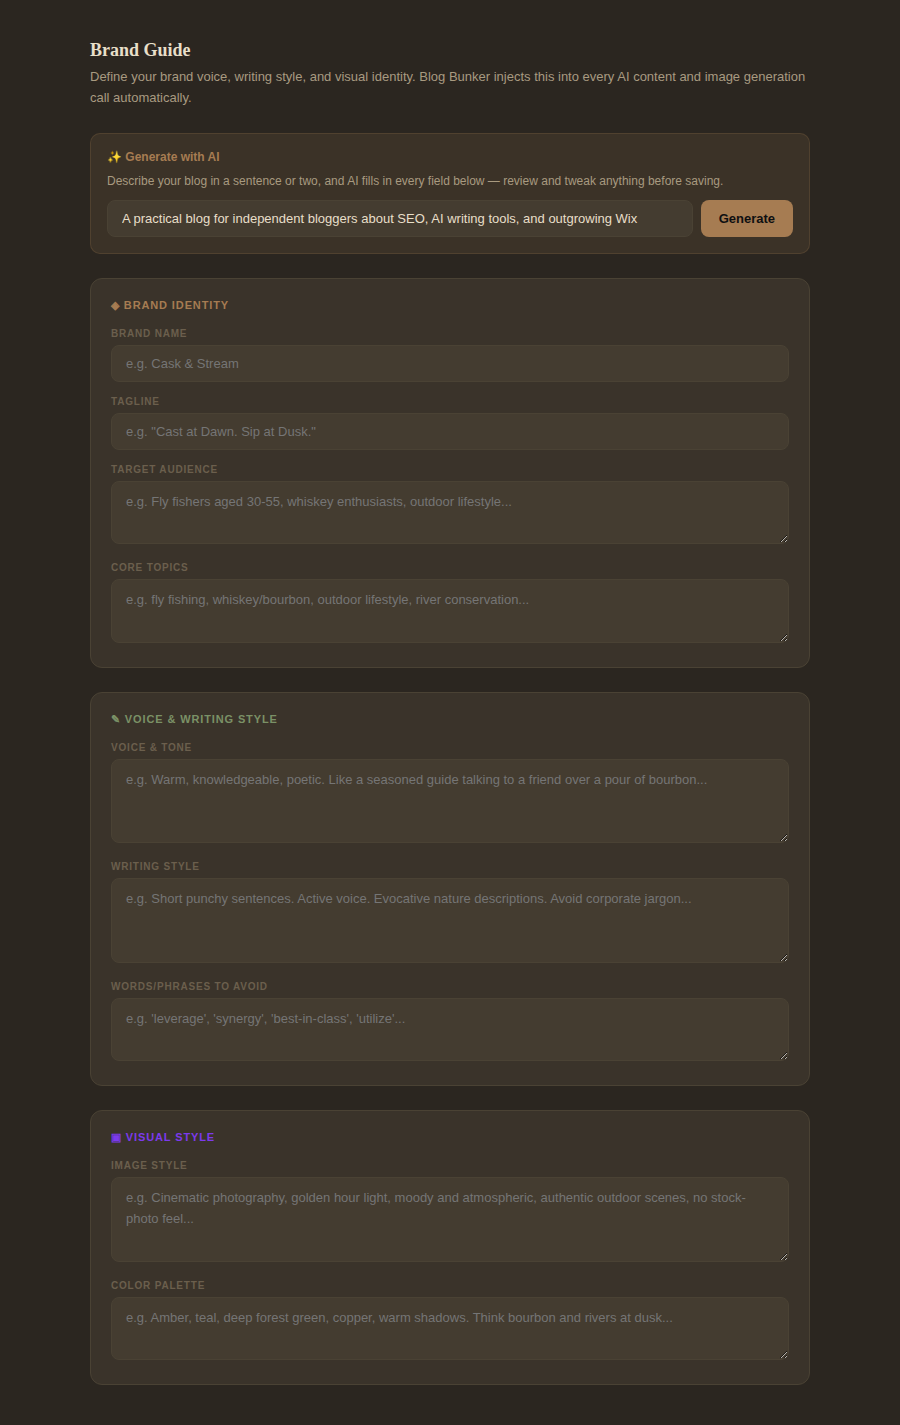
    This is your Brand Guide — it’s what lets the AI drafting sound like you instead of a generic AI voice. You’ve got two ways to fill it out:
    • The fast way: describe your blog in a sentence (“a fly fishing and whiskey blog with a laid-back, know-it-when-you-taste-it voice”) and click ✨ Generate with AI — it fills in your tagline, audience, topics, voice and tone, writing style, and more for you to review.
    • The manual way: fill in each field yourself if you already know exactly how you want it worded.
    Either way, you can always come back and refine this later from Settings — it’s not a one-time decision. blog-bunker-brand-guide-screenshot

    Step 3: Connect WordPress

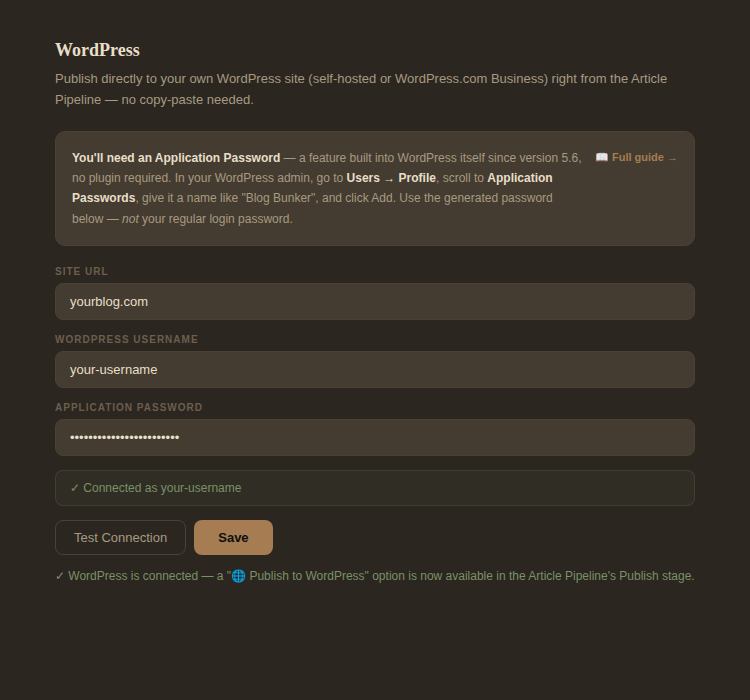
    If your blog runs on WordPress, this is where you connect it — and it’s genuinely the flagship piece of what Blog Bunker does, so it’s worth getting right up front. You’ll need a WordPress Application Password, not your regular login password. Here’s where to get one:
    1. In your WordPress admin dashboard, go to Users → Profile (or Users → Your Profile)
    2. Scroll down to Application Passwords
    3. Give it a name like “Blog Bunker” and click Add New Application Password
    4. WordPress will show you a password once — copy it immediately, you won’t see it again
    5. Paste that into Blog Bunker’s WordPress connection field, along with your site’s URL
    This is a real WordPress feature built into core — no plugin required. If you don’t run WordPress yet, or want to connect it later, you can skip this step for now. blog-bunker-wordpress-connect-screenshot

    Step 4: Choose your plan

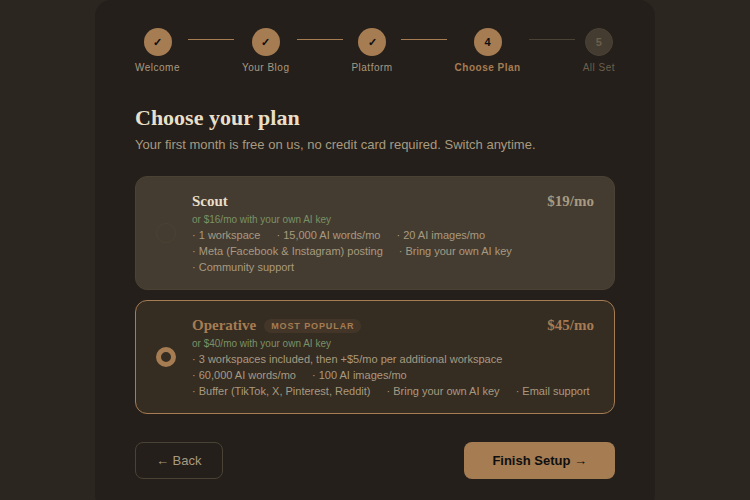
    Your first month runs on Scout, completely free — no card required. Explore the real app before deciding on anything. If you already know you want Operative’s larger AI allowance and full channel lineup, you can pick that instead. blog-bunker-plan-selection-screenshot

    Step 5: You’re in

    That’s it — you’re looking at your dashboard now. A quick map of what’s where:
    • Blog — your Article Pipeline (where posts get written) and Research tools
    • Marketing — your Social Pipeline, Media Library, and Image Studio
    • Analytics — your Blog Health Score and performance
    • Calendar — everything scheduled, blog and social together
    • Settings — your Brand Guide, connections, and plan
    Next up: The Field Manual 02 walks through writing and publishing your actual first post, start to finish.